- Log in to the UCx Web Portal.
- On the Group home page, click Services on the left-hand menu. On the Group – Services page, click Auto Attendant.
- The Auto Attendant page lists all Auto Attendants currently configured for your group. On this list, locate the Auto Attendant you wish to modify, and click Edit.
- The Profile page for the selected Auto Attendant will open. Click the Addresses link.
- The Auto Attendant Addresses page is displayed.
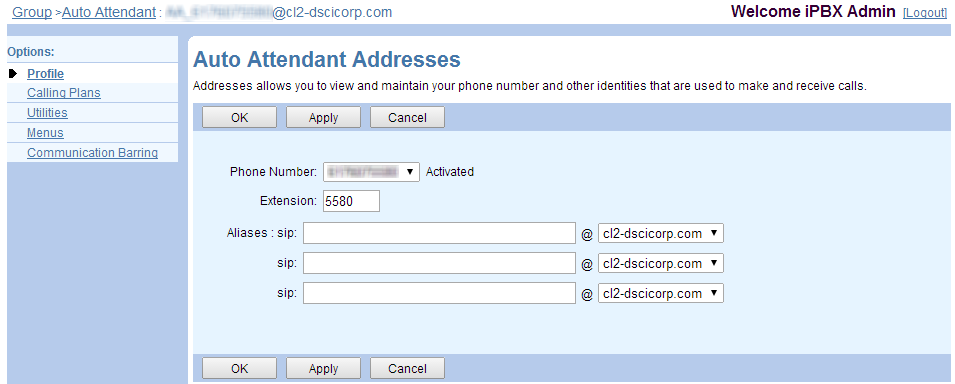
- View or edit the following fields, then click OK or Apply:
- Phone Number – The 10-digit phone number callers will dial to access the Auto Attendant.
- Extension – The internal extension callers will dial to access the Auto Attendant.
- Aliases – Specify up to three additional SIP addresses to associate with the Auto Attendant. Calls to any of these aliases are redirected to this Auto Attendant.
NOTE: If the Auto Attendant has only an extension programmed (no 10-digit phone number), outside calling parties will not be able to dial the Auto Attendant directly.